


Transform a cheap laundry basket into the most genius Christmas idea I’ve seen
Georgia Lynn
Contributing Writer
Like to see more from DIY Everywhere – Arts & Crafts
Welcome to a fun and festive DIY project that will add a unique touch to your holiday decorations! In this guide, we will transform an ordinary laundry basket into a beautiful Christmas tree skirt using chunky yarn or twine. This project is perfect for those who love to add a personal, handmade touch to their holiday decor.
Not only is it a great way to upcycle a household item, but it also allows you to customize the look to match your existing Christmas theme. Whether you’re an experienced crafter or a DIY beginner, this guide will provide you with step-by-step instructions to create a stunning, rustic tree skirt that’s sure to be a conversation starter. So gather your materials, and let’s get started on this creative journey to add a special handmade charm to your holiday celebrations!
Transform Cheap Laundry Basket into Christmas Tree Skirt
Like DIY Everywhere – Arts & Crafts for more
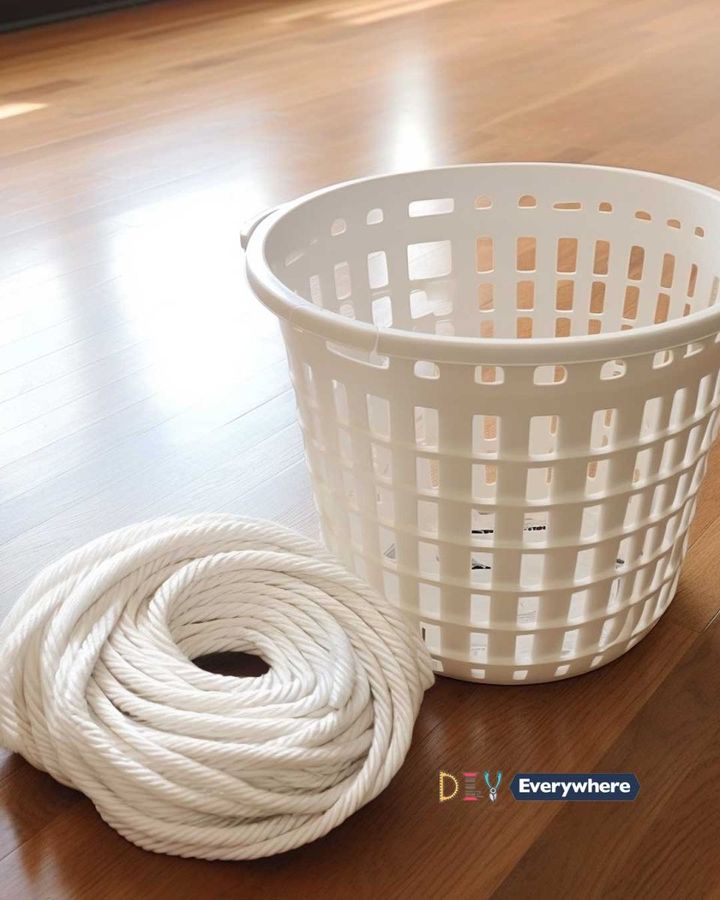
Materials Needed
Laundry Basket: Choose a basket that fits comfortably around the base of your Christmas tree. It should be sturdy and have a wide opening.
Chunky Yarn or Twine: Select a festive color or a neutral tone, depending on your Christmas decor theme.
Scissors: For cutting yarn or twine.
Hot Glue Gun and Glue Sticks: To attach the yarn or twine to the basket.
Decorative Elements (optional): Such as ribbons, Christmas ornaments, or artificial holly.
Instructions
Step 1: Prepare the Basket
Clean the Basket: Ensure the laundry basket is clean and dry. Remove any stickers or labels.
Remove the Top Rim (if needed): If the basket has a protruding rim, carefully remove it to create a smooth edge.
Step 2: Wrap the Basket
Start Wrapping: Begin at the bottom of the basket. Apply a line of hot glue along a small section of the basket.
Attach the Yarn/Twine: Firmly press the end of the yarn or twine into the glue. Once secure, start wrapping the yarn or twine around the basket, ensuring each wrap is close to the previous one.
Continue Wrapping: Keep applying glue in sections and wrapping the basket. Be careful not to leave gaps.
Step 3: Add Layers
Build Up Layers: As you reach the top of the basket, you can choose to add extra layers for a chunkier look. Overlap the yarn or twine slightly with each new layer.
Step 4: Finishing Touches
Secure the End: When you reach the top, cut the yarn or twine and secure the end with a dab of hot glue.
Trim Any Excess: If there are any loose ends or uneven spots, trim them with scissors.
Step 5: Decorate (Optional)
Add Decorations: Embellish your new Christmas tree skirt with ribbons, ornaments, or any other festive decorations. You can glue these on or tie them around the yarn/twine.
Step 6: Place Around the Tree
Position Your Skirt: Carefully place the basket upside down around the base of your Christmas tree. Adjust it to ensure it’s centered and stable.
Here are a few variations of the end result:
Like DIY Everywhere – Arts & Crafts for more
Tips
Choose the Right Yarn/Twine: Thicker yarn or twine gives a chunkier, more rustic look.
Be Patient: This project requires time and patience, especially to keep the wrapping neat and tight.
Experiment with Colors: Don’t be afraid to use different colors or textures of yarn or twine to match your Christmas decor.